How to Do Ghost Mannequin Photography
 AdWorker Team·
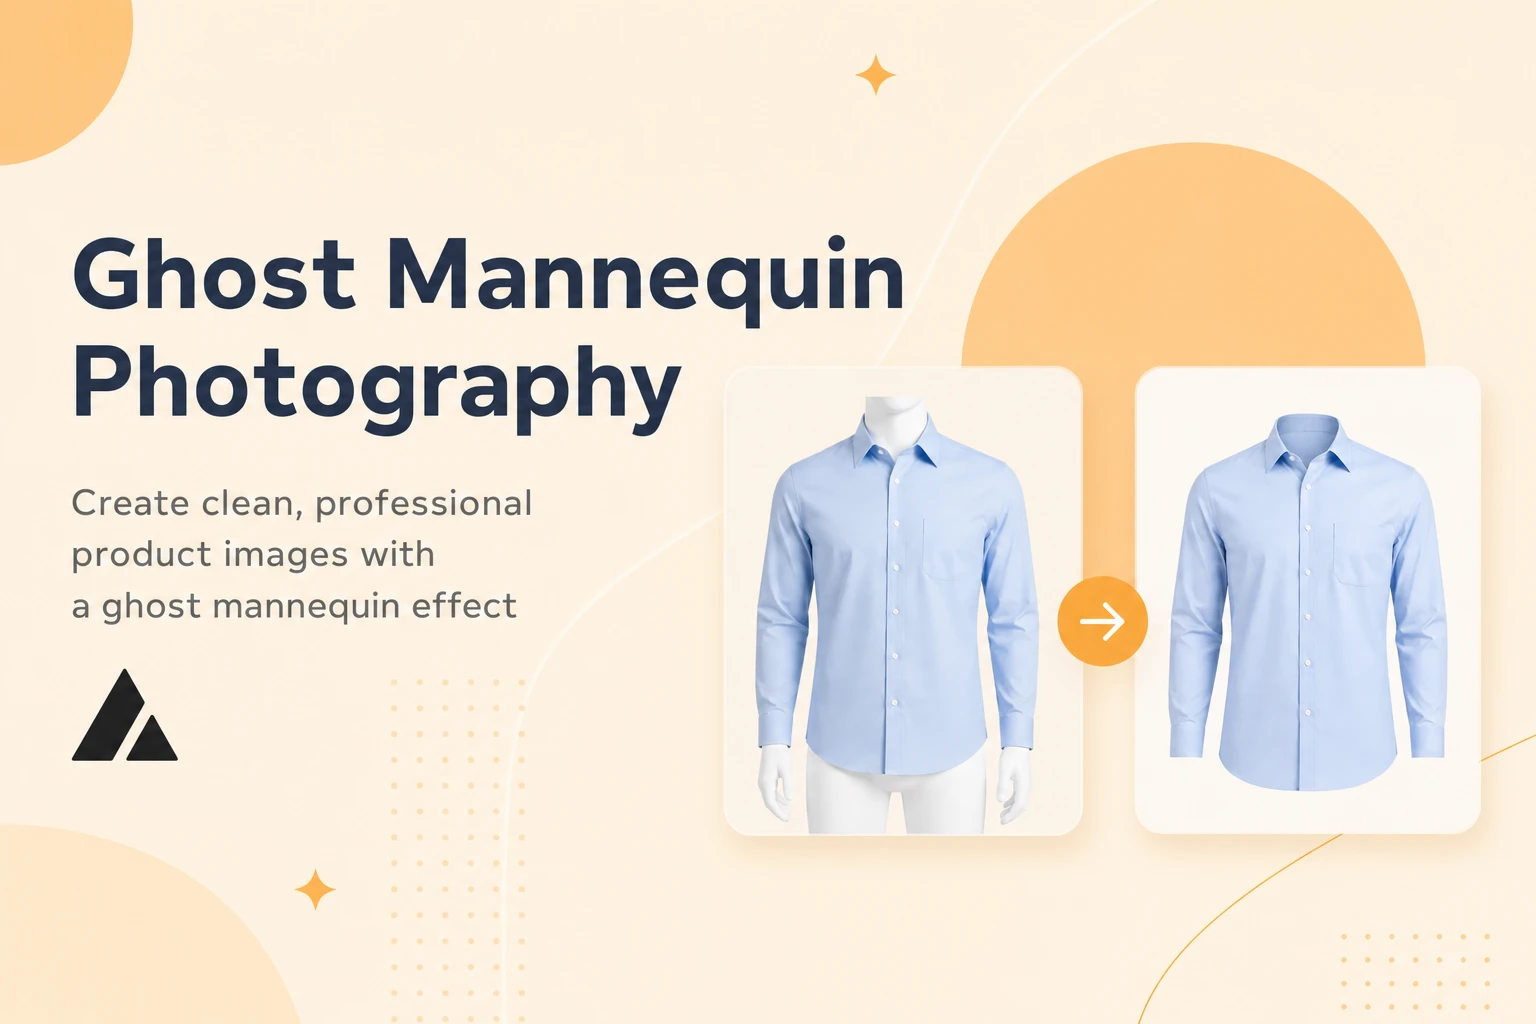
Ghost mannequin photography is the standard for ecommerce clothing images — but most sellers either overpay for editing services or spend hours wrestling with Photoshop layer masks. This guide covers every approach to the ghost mannequin effect: the traditional multi-shot Photoshop method, outsourced editing services, and AI tools that skip the mannequin entirely. Whether you are listing shirts on Amazon, hoodies on Shopify, or dresses on Etsy, this is the complete walkthrough.
Start here: AI ghost mannequin tool — upload a clothing photo and get the ghost mannequin effect in seconds, no Photoshop required.
What Is the Ghost Mannequin Effect
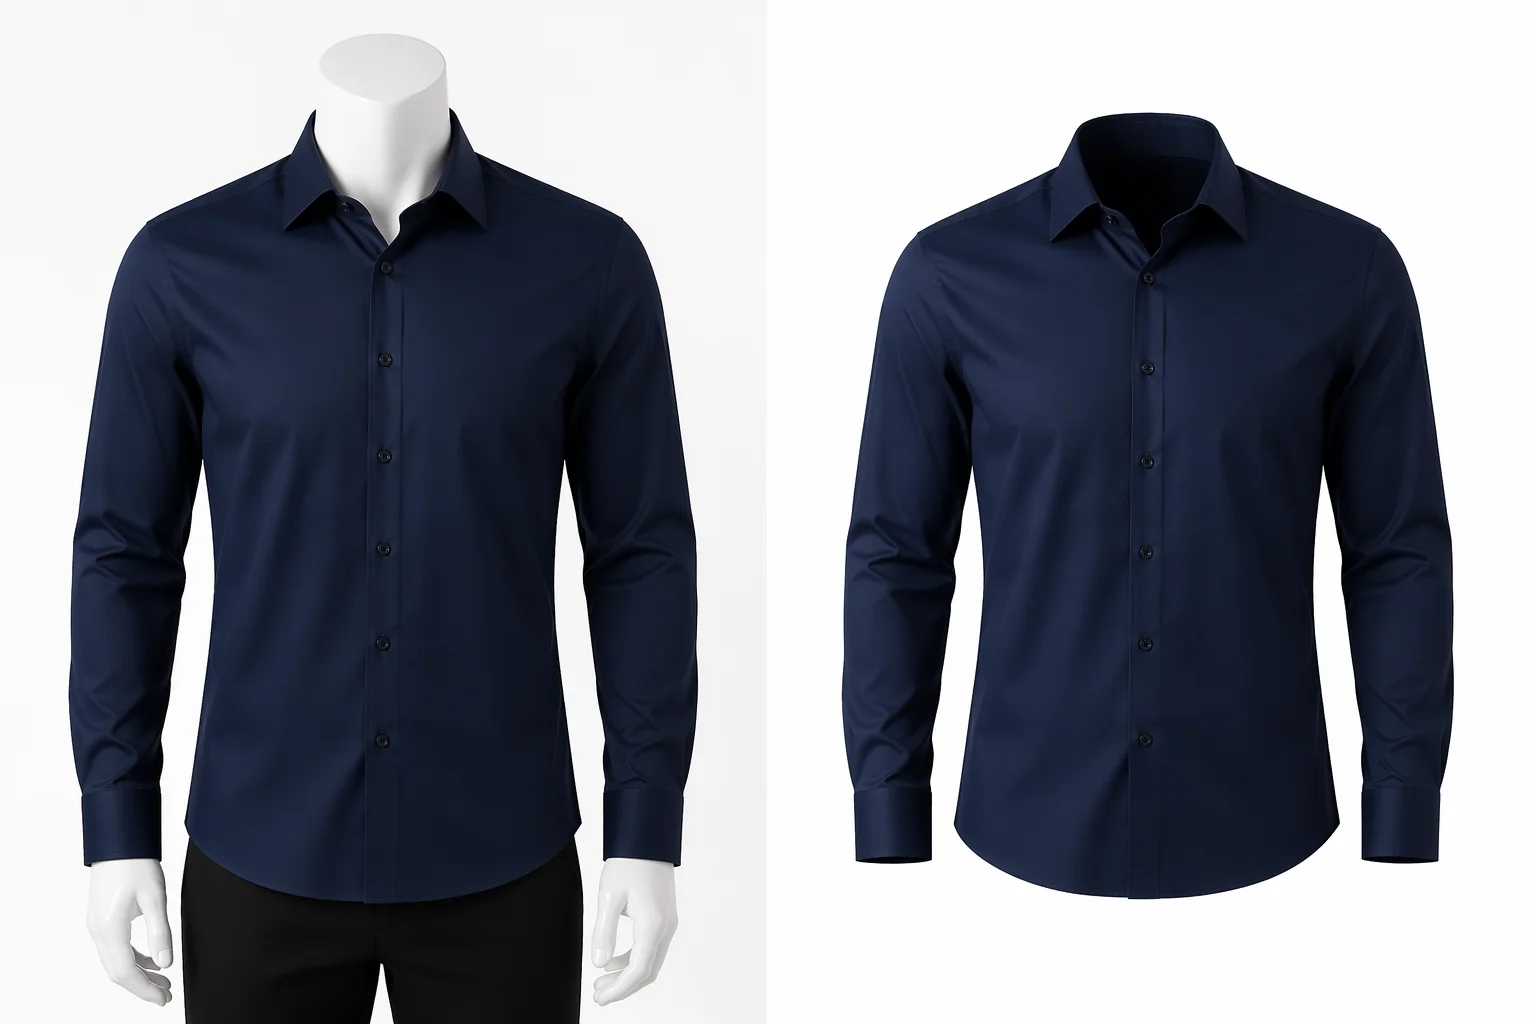
The ghost mannequin effect is a product photography technique that makes clothing appear as if it is being worn by an invisible person. The mannequin, model, or hanger is removed from the image, but the garment retains its three-dimensional shape — showing the neckline, sleeves, collar, and overall fit as if floating in space on a clean background.
The technique is also called invisible mannequin photography or the hollow man effect. All three terms describe the same result: a garment photo where the body is gone but the clothing keeps its natural worn shape. This creates a consistent, distraction-free look that lets shoppers evaluate the garment itself — its cut, drape, and proportions — without a model's body, a visible mannequin, or a hanger getting in the way.
Why the Effect Exists
The core problem ghost mannequin photography solves is visual consistency. If you photograph clothing on different models, every image looks different — different body shapes, skin tones, and poses create visual noise across a product catalog. Flat lay photos solve the model problem but lose the 3D shape of the garment. Ghost mannequin is the middle ground: consistent, three-dimensional, and model-free.
For marketplaces like Amazon, where shoppers scroll through dozens of similar listings, consistent ghost mannequin images create a professional impression that builds trust and makes products easier to compare.
Why Ecommerce Clothing Sellers Need Ghost Mannequin Product Photography
Ghost mannequin for ecommerce is not a stylistic preference — for many sellers, it is a practical requirement driven by marketplace rules and conversion data.
Marketplace Image Requirements
Amazon requires that the main product image has a pure white background (RGB 255, 255, 255) with the product filling at least 85% of the frame. No mannequins, hangers, or distracting props are allowed in the main image slot. Shopify and Etsy do not enforce identical rules, but clean white-background product photos consistently outperform cluttered alternatives in A/B testing across all platforms.
Ghost mannequin photography checks every box: white background, no model or mannequin visible, garment fills the frame, and the three-dimensional shape communicates fit better than a flat lay. For clothing brands managing dozens or hundreds of SKUs — shirts, jackets, hoodies, dresses, swimwear — ghost mannequin provides a repeatable, consistent format across the entire catalog.
Conversion Impact
Professional product images improve ecommerce conversion rates by 30 to 40 percent compared to amateur photography. For clothing specifically, the ghost mannequin effect has an additional advantage: it shows garment structure without the distraction of a model. Shoppers can evaluate the collar shape, sleeve length, and overall fit — the details that determine whether a garment matches what they are looking for — more objectively than with an on-model photo where the model's body shape influences perception.
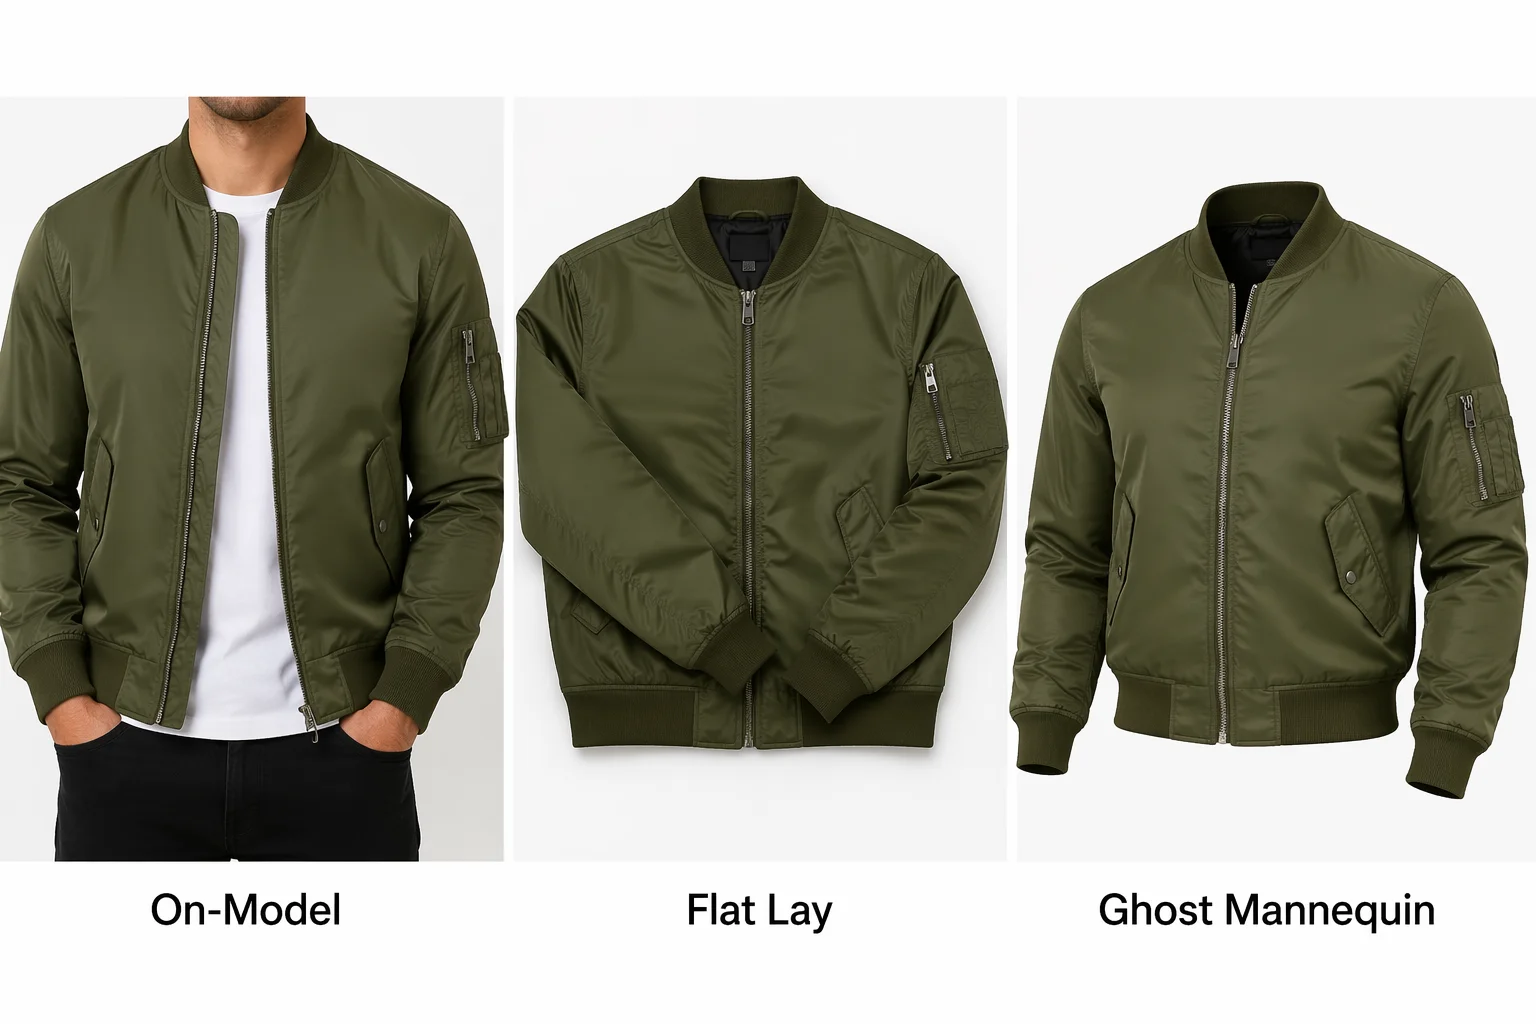
Ghost Mannequin vs On-Model vs Flat Lay Photography
These three approaches serve different purposes. Understanding when to use each one saves both time and money.
| Aspect | On-Model | Flat Lay | Ghost Mannequin |
|---|---|---|---|
| 3D shape visible | Yes | No — garment is flat | Yes |
| Shows fit on a body | Yes — but tied to model's body type | No | Partially — shows garment structure without body bias |
| Visual consistency across catalog | Low — varies with each model | Medium — depends on styling | High — same format for every product |
| Cost per image | $50–200+ (model + photographer) | Low (DIY friendly) | $3–15 per image (service) or free (AI) |
| Best for | Lifestyle shots, social media, lookbooks | Quick listings, budget sellers | Main product images, marketplace listings |
When to use each:
- On-model photos are best for lifestyle context — social media ads, lookbook pages, and marketing campaigns where you want to show how the garment looks when styled and worn. They are expensive and inconsistent across a catalog, so they work better as secondary images.
- Flat lay is the fastest and cheapest option. It works for casual listings and marketplaces where professional quality is not critical. The downside is that flat clothing does not communicate fit, drape, or structure — a jacket looks the same as a shirt when both are flattened.
- Ghost mannequin is the standard for main product images on Amazon, Shopify, and other ecommerce platforms. It balances visual quality, consistency, and cost. Many sellers use ghost mannequin for the primary listing photo and on-model for secondary lifestyle images.
If you have flat lay photos and want to upgrade them to ghost mannequin without a reshoot, an invisible mannequin tool can convert flat lays into structured ghost mannequin output automatically.
How to Create Ghost Mannequin Photos with Photoshop — The Traditional Method
The traditional ghost mannequin workflow requires two things: a mannequin (or a model willing to be erased) and Photoshop skills. This section walks through the full process step by step — the same workflow used by professional ghost mannequin photo editing services, just done in-house.
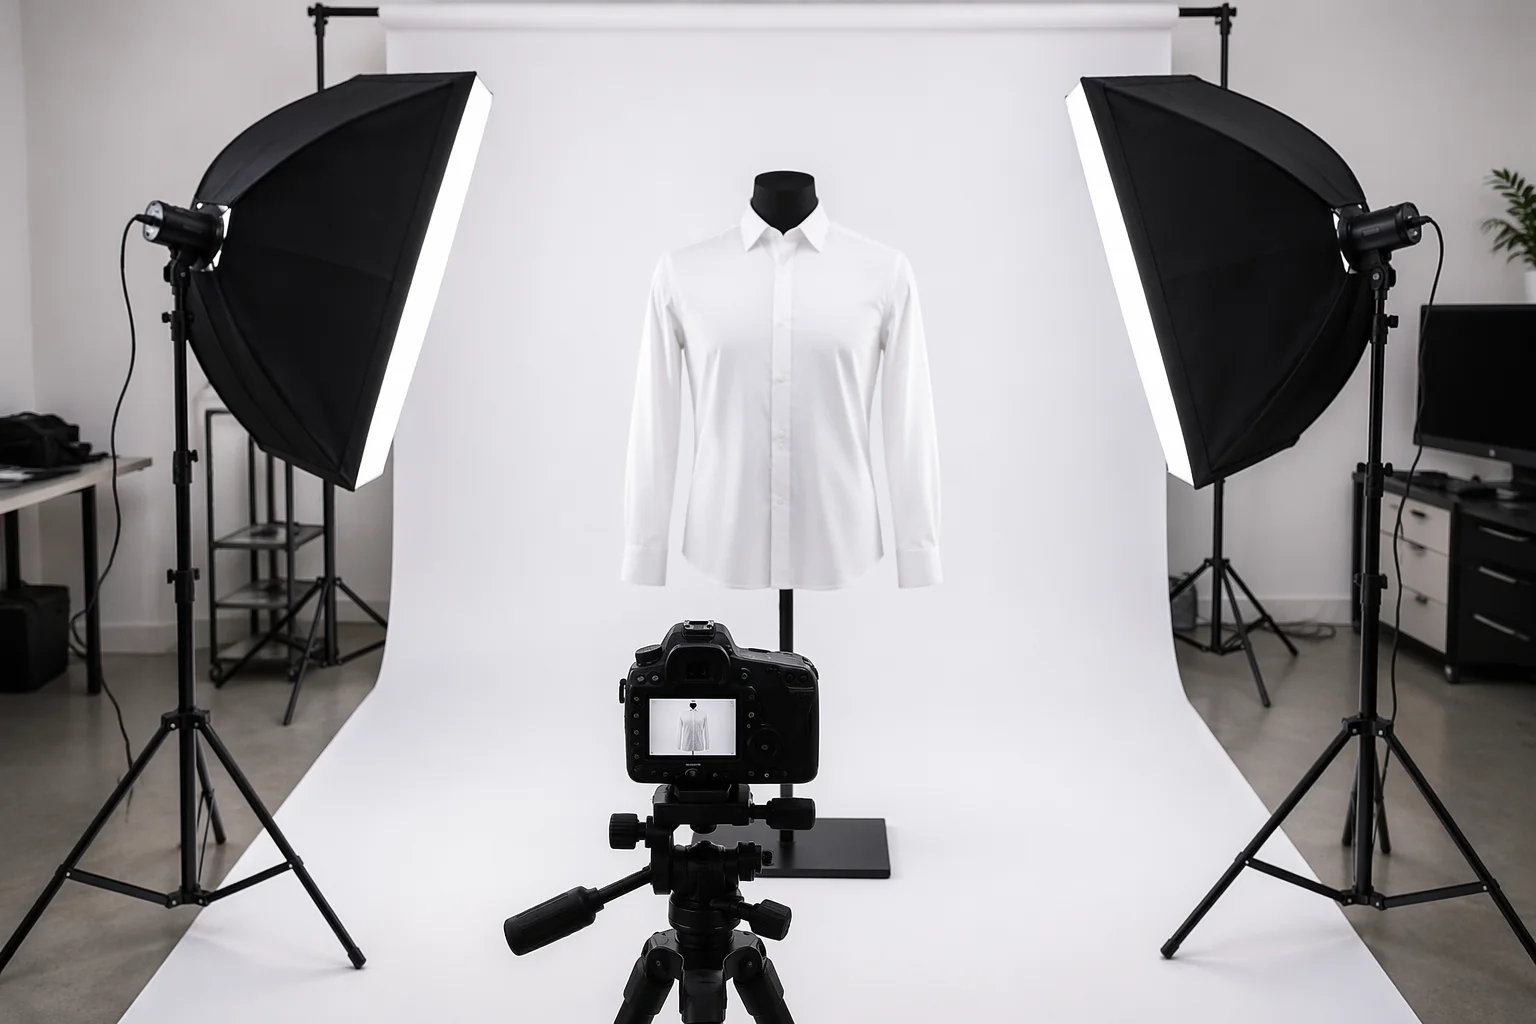
Equipment You Need
- A mannequin — preferably one with removable limbs and neck piece. Adjustable dress forms work for some garments but make neck joint editing harder.
- Camera and tripod — any DSLR or mirrorless camera with manual exposure control. A tripod ensures consistent framing between the main shot and the inner label shot.
- Consistent lighting — two softbox lights at 45-degree angles is the standard studio setup. The goal is even, shadow-free lighting that does not change between shots.
- White background — a white seamless paper or fabric backdrop. This can be replaced later, but starting with white saves editing time.
- Photoshop — or a comparable editor that supports layers and masks.
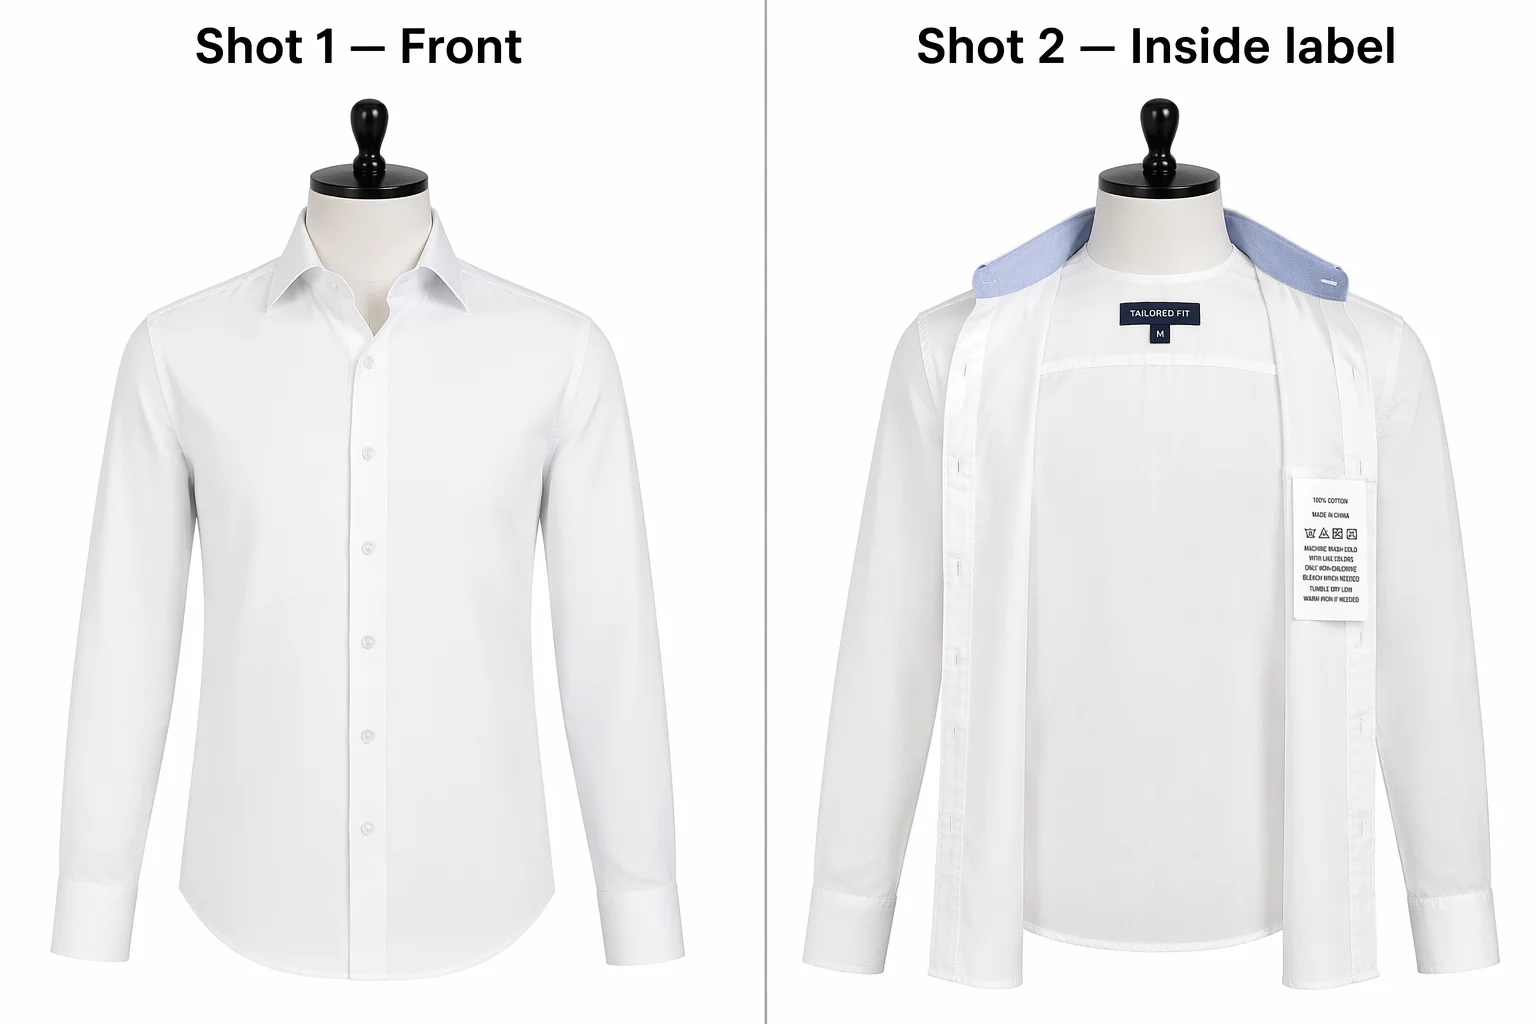
Step 1 — Shoot the Garment on the Mannequin
Dress the mannequin and photograph it from directly in front. Frame the garment to fill roughly 80–85% of the image area. Make sure the neckline, collar, and sleeve openings are clearly visible — these areas are what you will need to reconstruct after removing the mannequin.
Shoot in RAW if your camera supports it. RAW files preserve more detail for edge masking.
Step 2 — Shoot the Inside Label and Collar
Without moving the camera or changing the lighting, remove the garment from the mannequin, flip it inside out, and place it back. The goal is to photograph the inner collar, neckline, and label area — the part that was hidden behind the mannequin's neck in the main shot.
This second shot is critical for neck joint editing. It provides the visual information Photoshop needs to reconstruct what the inside of the collar looks like once the mannequin is removed. Skip this step and you will have a gaping hole where the mannequin's neck used to be.
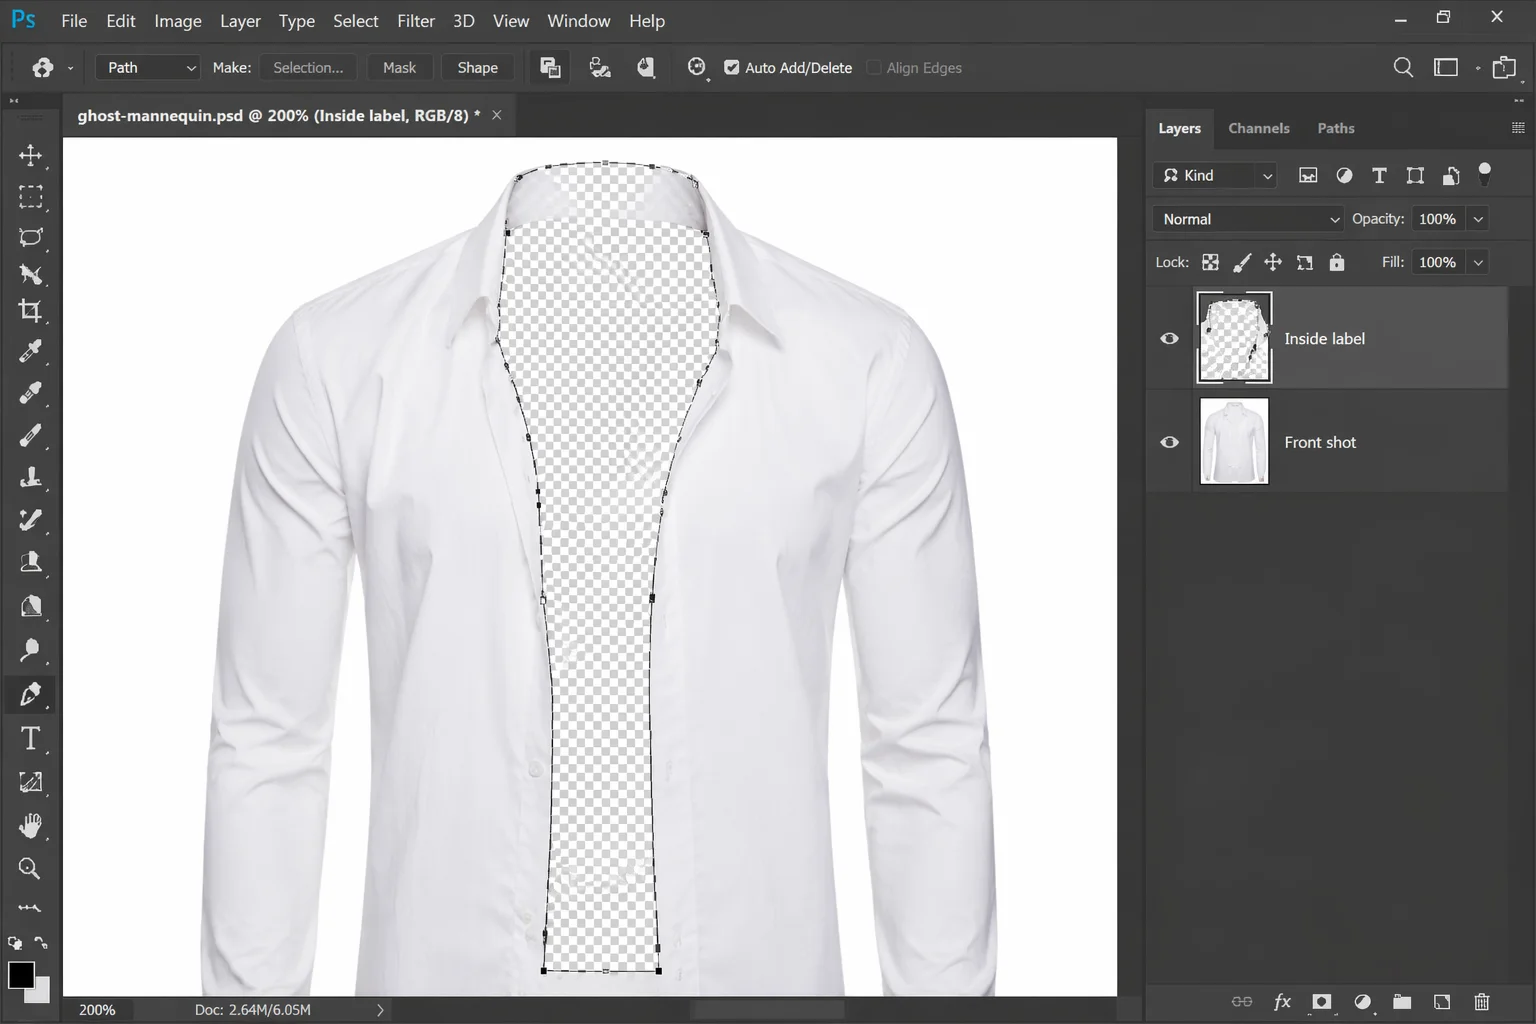
Step 3 — Remove the Mannequin in Photoshop
Open both images in Photoshop. Place the inside label shot as the base layer and the main garment shot above it. Using the Pen Tool or Quick Selection Tool, carefully select the mannequin — neck, torso, arms — and mask it out from the main garment layer. The inside label layer below fills through the gaps where the mannequin was removed.
The masking must be precise. Rough edges here mean rough edges in the final product photo. Zoom to 200–300% and work around the garment outline pixel by pixel, especially at the collar, sleeve openings, and hem.
Step 4 — Neck Joint Editing
This is the hardest and most time-consuming part of ghost mannequin photo editing. After the mannequin is removed, the collar area has a gap — you can see straight through to the background where the mannequin's neck was. Neck joint editing fills this gap using the inside label shot from Step 2.
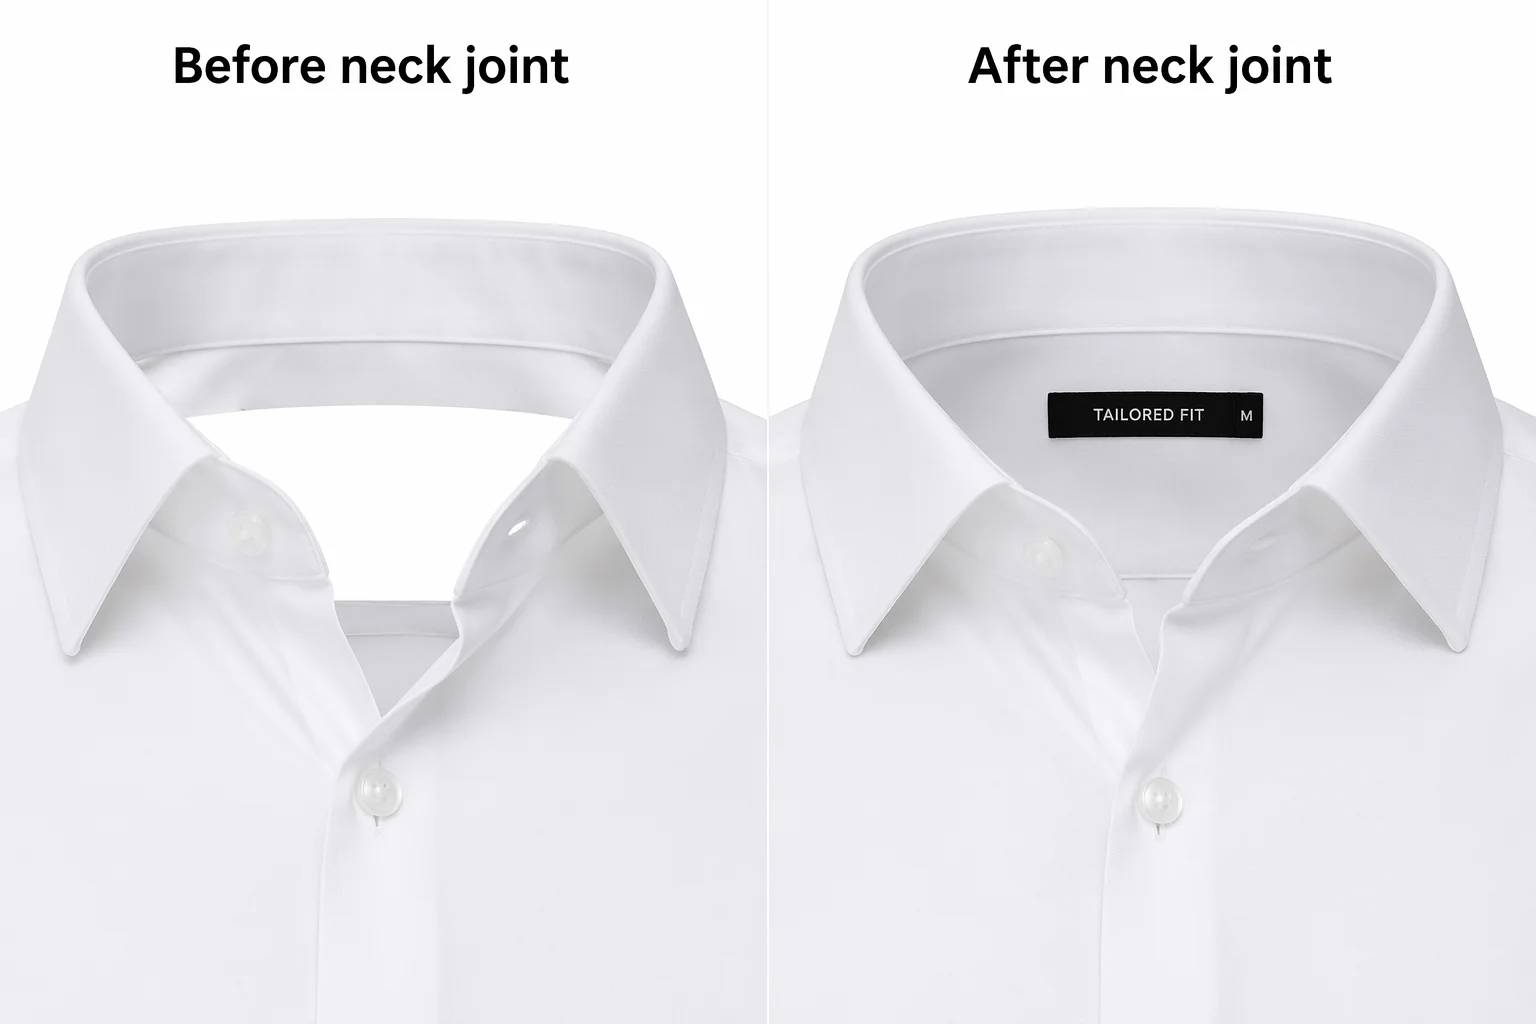
From the inside label layer, select just the collar and neckline area. Position it behind the main garment layer so it fills the gap. Blend the edges using layer masks and the Clone Stamp tool. The result should look like you can see slightly into the collar — the hollow form that gives ghost mannequin its name.
For a clean neck joint, the lighting and white balance between the two shots must match exactly. If they do not, the inner label area will look obviously composited — different color temperature, different shadow direction, different exposure. This is why shooting both images on a tripod with identical lighting settings is essential.
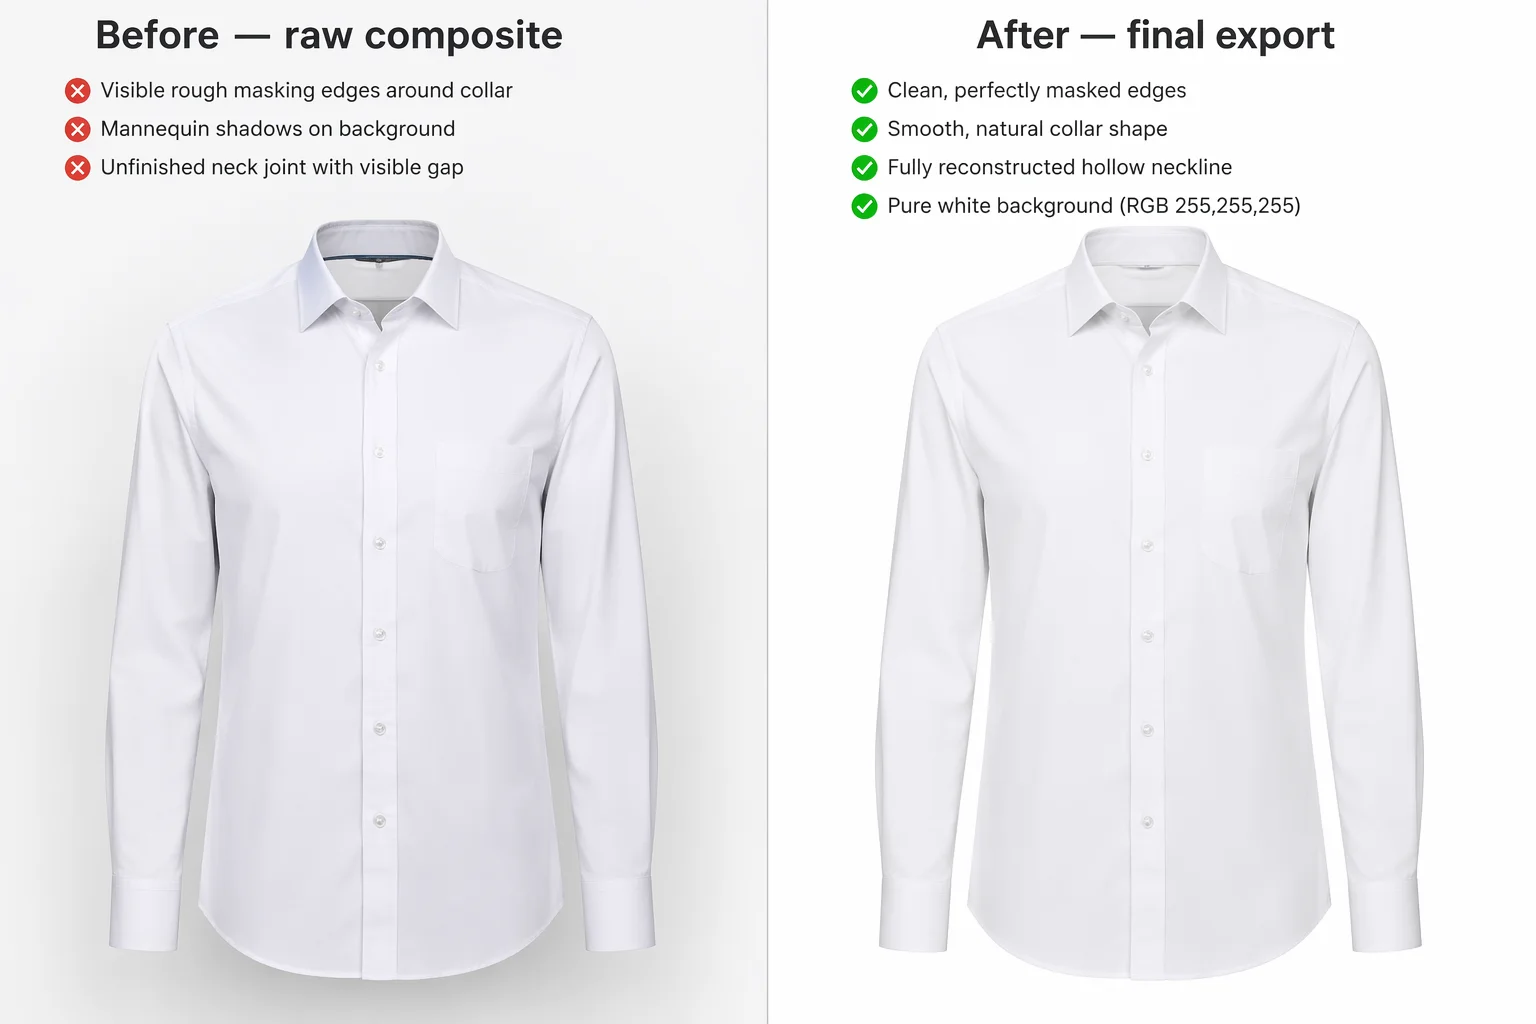
Step 5 — Clean Up and Export
With the mannequin removed and the neck joint reconstructed, clean up any remaining artifacts — stray mannequin edges, shadow inconsistencies, dust spots. Adjust the garment outline to ensure smooth, natural edges. Do not add drop shadows to the main product image — Amazon requires a pure white background (RGB 255, 255, 255) and shadows will conflict with that requirement.
Export as a high-resolution PNG on a white background. For Amazon compliance, ensure the background is pure white (RGB 255, 255, 255) and the garment fills at least 85% of the frame.
Time per image: 15 to 30 minutes for an experienced Photoshop editor. 45 to 60 minutes for someone learning the workflow. Multiply by your catalog size to understand the real cost of the DIY ghost mannequin Photoshop approach. If the manual workflow is too slow, an AI ghost mannequin generator can produce comparable results in seconds.
How AI Ghost Mannequin Technology Works
The traditional Photoshop workflow works, but it assumes you have a physical mannequin, a consistent studio setup, and the Photoshop skills to execute neck joint editing cleanly. For many ecommerce sellers — especially those managing inventory from home, dropshippers without access to the physical product, or small brands without a design team — this is not realistic.
AI ghost mannequin tools — the main ghost mannequin photography alternative to the traditional method — solve this by skipping the mannequin entirely. Upload a photo of clothing — on a model, on a hanger, or even laid flat — and the AI reconstructs the ghost mannequin shape automatically. No mannequin purchase, no second shot for the inner label, no Photoshop layer masking, no neck joint compositing.

The AI approach has three practical advantages over the traditional method:
- No mannequin required. You can create ghost mannequin photos from model shots, hanger photos, or flat lays — any image of the clothing works as input. This matters for sellers who receive product photos from manufacturers and cannot reshoot.
- No neck joint editing. The AI infers what the inner collar looks like from the garment shape and reconstructs it automatically. This eliminates the most time-consuming step of the Photoshop workflow.
- Seconds instead of minutes. Processing takes 15 to 30 seconds per image, compared to 15 to 30 minutes of manual editing. For a catalog of 50 products, the difference is 25 minutes vs 25 hours.
The ghost mannequin tool at AdWorker works this way — upload up to three garment photos (main photo required, inside label and extra angle optional), and download a white-background ghost mannequin product photo. For sellers who also need clean white-background output on static product photos, the white background tool handles that in one step.
What About Photoroom and Canva?
Two tools that sellers frequently ask about for ghost mannequin work:
Photoroom is an excellent AI background remover for static images. It can remove the background from a photo of clothing on a model or mannequin, but it does not reconstruct the ghost mannequin shape — the neck joint, inner collar, and hollow form are not generated. The output is a cutout of whatever was in the photo, including the visible mannequin or model. Photoroom is great for background removal, but it is not a ghost mannequin tool.
Canva does not have a ghost mannequin feature. Its background remover works on static images and removes the background, but — like Photoroom — it does not remove the mannequin from inside the clothing or reconstruct the collar area. For ghost mannequin photography, Canva is not the right tool.
Ghost Mannequin Photo Editing Services — When to Outsource
If you need ghost mannequin images but do not want to do the Photoshop work yourself and AI output does not meet your quality bar for complex garments, professional ghost mannequin photo editing services are the traditional solution.
What Services Typically Cost
| Service Tier | Price per Image | Turnaround | Best For |
|---|---|---|---|
| Budget (offshore) | $1–5 | 24–48 hours | High volume, simple garments |
| Mid-range | $5–15 | 12–24 hours | Consistent catalog quality |
| Premium | $15–30+ | Same day | Complex garments, brand-critical images |
Most services charge per image and require a minimum order of 10 to 50 images. The price typically includes mannequin removal, neck joint editing, background cleanup, and basic color correction. Complex garments — lace, mesh, transparent fabrics, multi-layered outfits — usually cost more because they require more manual editing time.
When Services Make Sense
Ghost mannequin editing services are worth the cost when:
- You have complex garments that AI tools handle inconsistently (fine lace, transparent mesh, layered outfits)
- You need pixel-perfect quality for a premium brand and can afford $15+ per image
- You have a large catalog and need batch processing with consistent quality across hundreds of images
For most small to mid-size sellers, the practical workflow is: use a free ghost mannequin tool for the bulk of your catalog, and send the few complex garments that need extra attention to a service.
What Clothing Types Work Best for Ghost Mannequin Photography
The ghost mannequin effect works well for most standard apparel categories, but results vary by garment complexity.
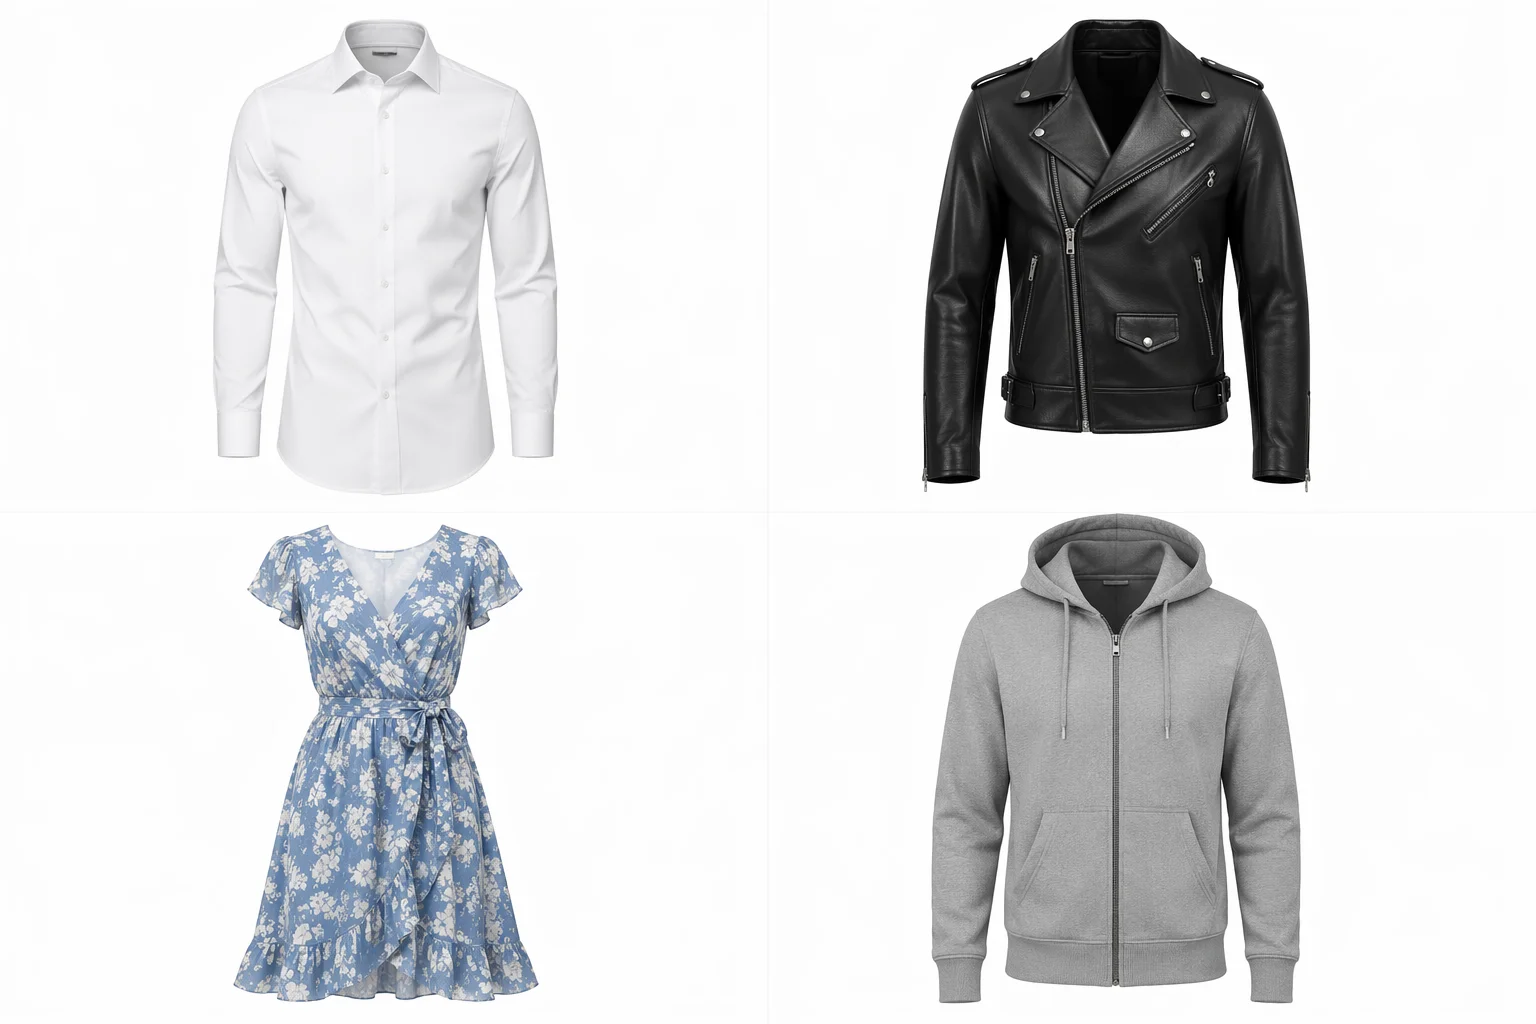
Works best:
- T-shirts, polo shirts, dress shirts — simple structure, clear collar, predictable shape
- Jackets and blazers — strong 3D form, looks impressive as ghost mannequin
- Hoodies and sweatshirts — natural ghost mannequin shape with hood adding dimension
- Dresses — simple silhouettes produce clean results
- Suits — professional catalog staple, ghost mannequin is the industry standard format
Works but may need manual review:
- Swimwear — thin straps and minimal fabric require precise edge detection
- Knitwear — loose weaves can make edge detection harder
- Lace and mesh — transparent areas confuse both AI and manual masking
Not ideal:
- Accessories (scarves, hats, belts) — no 3D body shape to preserve, flat lay or standalone shots work better
- Heavily layered outfits — multiple overlapping garments create complex depth that is hard to separate cleanly
Ghost Mannequin Photography Tips for Better Results
Whether you are using the Photoshop method or an AI tool, these tips improve the quality of your ghost mannequin output.
Use a consistent mannequin size. If you are shooting multiple garments, use the same mannequin for all of them. Switching mannequins changes the garment proportions between images, breaking visual consistency across your catalog.
Pin and clip garments to fit properly. A loose garment on a mannequin looks baggy in the final image. Use binder clips on the back of the garment — invisible from the front — to pull the fabric taut and show the intended fit.
Steam or iron before shooting. Wrinkles that are barely visible in person become obvious in a high-resolution product photo. Steaming the garment on the mannequin is faster than ironing and avoids accidental shine marks on certain fabrics.
Shoot the back view separately. For garments with back design details — print, stitching, zipper — a separate back-view ghost mannequin image adds value to the product listing. Amazon allows up to 9 images per listing, and a back view is one of the most useful secondary angles. Pair the ghost mannequin output with AI product photos for lifestyle secondary images.
Match your lighting between shots. If you are using the traditional two-shot method (main garment + inside label), the lighting must be identical between both shots. Any difference in color temperature or shadow direction will make the neck joint composite look unnatural.
Frequently Asked Questions
How much does ghost mannequin photography cost?
The cost depends on your approach. DIY with Photoshop costs your time — roughly 15 to 30 minutes per image if you are experienced. Professional ghost mannequin editing services charge $3 to $30 per image depending on complexity and turnaround speed. AI tools range from free (like the AdWorker ghost mannequin tool) to $0.50–2.00 per image on paid platforms. For most small sellers, starting with a free AI tool and outsourcing only the complex garments is the most cost-effective path.
Can I turn a flat lay photo into a ghost mannequin image?
Yes — this is one of the main use cases for AI ghost mannequin tools. Upload a flat lay image and the AI reconstructs the 3D garment shape, adding depth and structure that the flat photo does not have. The result is not identical to shooting on a physical mannequin — some structural details may be inferred rather than photographed — but for most ecommerce purposes, the output is clean and professional enough for a product listing. The ghost mannequin photo tool accepts flat lays, hanger photos, and on-model shots as input.
Can I create ghost mannequin photos without a real mannequin?
Yes. AI tools eliminate the need for a physical mannequin entirely. You can start with any photo of the clothing — a model wearing it, a hanger shot, or even a flat lay on a table — and the AI generates the ghost mannequin shape from that input. This is especially useful for dropshippers and sellers who receive manufacturer photos and cannot reshoot the product themselves.
Do I need to learn Photoshop for ghost mannequin editing?
Not anymore. The traditional ghost mannequin Photoshop workflow — layer masking, neck joint compositing, edge cleanup — was the only option for years, and it still produces the highest-quality results in the hands of a skilled editor. But AI ghost mannequin tools now handle the entire process automatically, including neck joint reconstruction. For most ecommerce sellers, the AI output is more than sufficient for marketplace listings. Save Photoshop for cases where AI output needs manual refinement — fine lace edges, transparent fabrics, or unusual garment structures.
Does Photoroom support ghost mannequin?
No. Photoroom is an AI background remover — it removes the background from a photo, but it does not remove the mannequin from inside the clothing or reconstruct the collar and neckline area. If you upload a photo of clothing on a mannequin to Photoroom, you will get a cutout of the clothing with the mannequin still visible. For ghost mannequin photography specifically, you need a tool designed for that purpose.
What is the best ghost mannequin format for Amazon product images?
Amazon requires main images to have a pure white background (RGB 255, 255, 255), with the product filling at least 85% of the image area. The minimum resolution is 1000 pixels on the longest side, though 2000+ pixels is recommended for the zoom feature. Ghost mannequin photos should be exported as high-resolution JPEG or PNG files in sRGB color mode. After creating your ghost mannequin image, verify the white background is truly pure white — off-white (#F5F5F5 or similar) can trigger listing suppression. For clean white-background output in one step, you can also use the white background tool.
What are the alternatives to traditional ghost mannequin photography?
The main alternatives are AI ghost mannequin tools, outsourced photo editing services, and flat lay photography. AI tools are the fastest and cheapest ghost mannequin photography alternative — upload any clothing photo and get the invisible mannequin effect without a physical mannequin or Photoshop skills. Editing services ($3–30 per image) offer manual precision for complex garments like lace or mesh. Flat lay skips the 3D effect entirely but loses the garment shape that makes ghost mannequin valuable for ecommerce. Most sellers combine AI for the bulk of their catalog with manual editing for the few garments that need extra attention.
Can I do ghost mannequin photography at home without professional equipment?
Yes, though the quality ceiling is lower. A basic DIY ghost mannequin setup needs: a torso mannequin ($30–80 from Amazon), two desk lamps with daylight bulbs as light sources, a white poster board or bedsheet as backdrop, and a smartphone camera. The biggest challenge is consistent lighting — uneven shadows make the editing process harder whether you are using Photoshop or AI. If investing in a mannequin is not practical, skip the mannequin entirely and use an AI tool with your existing product photos — model shots, hanger photos, or flat lays all work as input.